-
10 Wendell Ave Extension Pittsfield, MA 01201
-
210 Columbia St., Lee, MA 01238

Knowing how to install asphalt roofing roll correctly can save you money and protect your property — but only if it’s the right material for your situation. Here’s a quick overview:
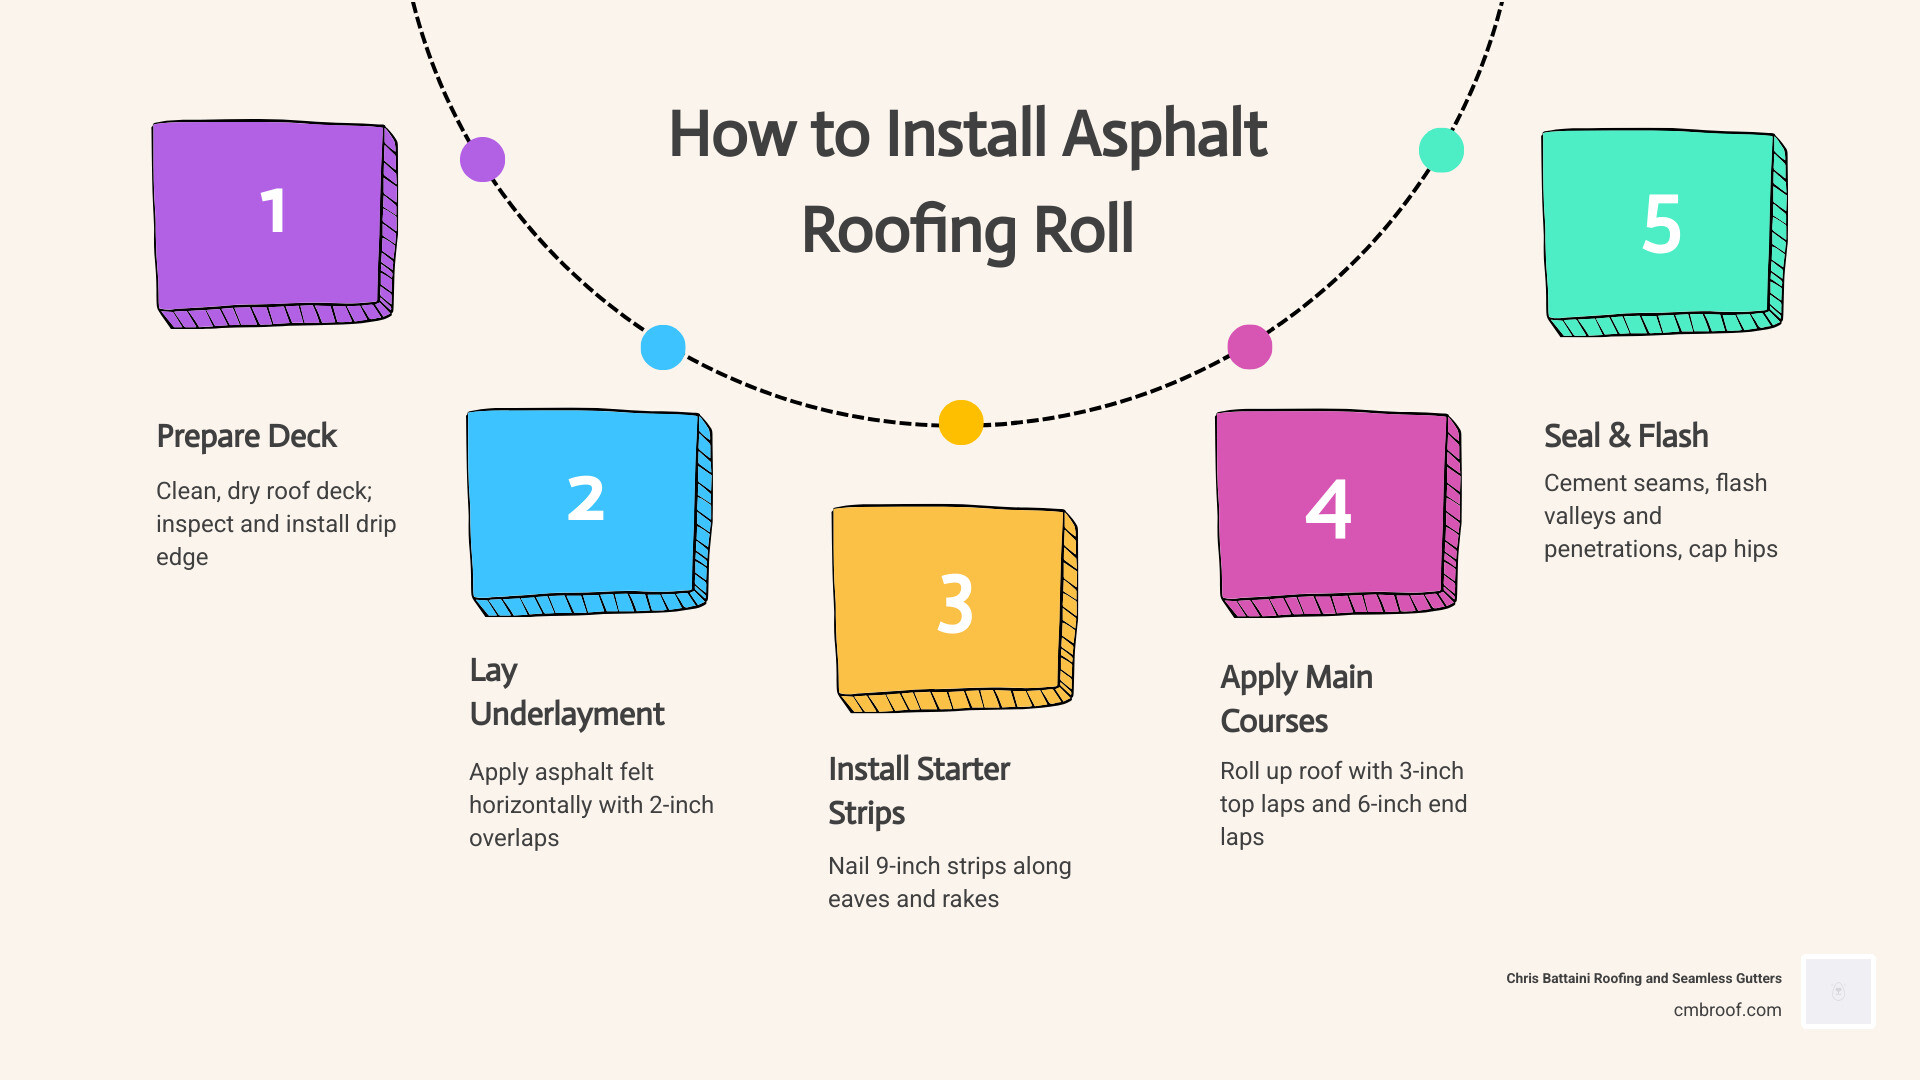
How to install asphalt roll roofing (quick steps):
Best for: Sheds, detached garages, workshops, and other low-slope outbuildings — not primary residences.
Asphalt roll roofing is the most affordable roofing material available. Material costs typically range from $1.50 to $7.50 per square foot based on online industry data — though your actual project cost will vary based on scope, deck condition, and local labor. Each roll covers roughly 96 to 100 square feet and weighs around 72 pounds. It installs much faster than traditional shingles.
But it comes with real trade-offs. The lifespan is short — typically 5 to 8 years — compared to 20 or more years for composite shingles. It’s also less attractive and can hurt resale value on residential properties. For homeowners in Pittsfield, MA, Dalton, MA, and the surrounding Berkshire County area, it’s best suited to functional outbuildings where budget matters more than appearance.
Is this a DIY job? It can be — for simple, single-story structures. But mistakes in flashing, sealing, or nailing are common and lead to early failures. If you’re unsure at any point, calling a licensed professional is always the smarter call.
I’m Christopher Battaini, owner of Chris Battaini Roofing and Seamless Gutters, and with over two decades of roofing experience across Massachusetts, I’ve seen what separates a roll roofing job that lasts from one that leaks within a season. In this guide, I’ll walk you through exactly how to install asphalt roofing roll the right way — and flag the spots where a professional’s eye makes all the difference.
Asphalt roll roofing, also known in the industry as Mineral-Surfaced Roll (MSR) roofing, is essentially a thinner, lighter, and continuous version of standard asphalt shingles. It consists of an organic or fiberglass felt mat saturated with asphalt and coated with tough mineral granules on the top surface to guard against UV rays.
However, unlike individual shingles, roll roofing is designed to cover large areas quickly with minimal seams. Because of its structural properties, it is highly specialized. It is not designed to handle the aesthetic demands or the wind-uplift profiles of a high-pitch residential home. Instead, we recommend roll roofing for low-slope, unoccupied structures such as:
Understanding your roof’s slope (or pitch) is the single most critical factor before deciding on roll roofing. Roof pitch is calculated as a ratio of vertical rise to horizontal run.
If you are dealing with a low-slope residential extension or a primary living space in Pittsfield, MA or Dalton, MA, we strongly advise looking into more durable residential options. You can read about alternative systems in our Asphalt Shingle Roofing Complete Guide.

Before you begin, gathering the correct toolkit is essential to ensure your installation proceeds smoothly and safely.
Excellent preparation is the secret behind a long-lasting roof. If you are installing a new roof in Lanesborough, MA or Dalton, MA, we strongly recommend stripping any old roofing material down to the bare wooden deck. While some local codes technically allow laying roll roofing over a single layer of old shingles, doing so creates an uneven surface that makes it almost impossible to get a watertight seal on the seams.
For more details on proper deck preparation and underlayment selection, check out our guide on Roll With It: Your Ultimate Guide to Asphalt Roll Roofing Installation.
There are two primary ways to install asphalt roll roofing: the concealed nail method and the exposed nail method.
To maximize the service life of your low-slope roof, we always recommend the concealed nail method. Because the nails are hidden beneath the overlapping layers of roofing and sealed with heavy lap cement, they are never exposed to rain, snow, or ice. This drastically reduces the risk of rust and leaks.
Let’s break down both techniques step-by-step.
The concealed nail method provides the ultimate protection for low slopes between 1:12 and 2:12.
Roll out your 15-pound asphalt-saturated felt paper horizontally, starting at the bottom edge (eaves). Overlap each row by at least 2 inches. Secure it with just enough fasteners to hold it in place. Next, snap a horizontal chalk line exactly 35 inches up from the lower eave line. This gives you a perfectly straight reference line for your first course of roll roofing.
Cut a 9-inch-wide starter strip from your roll of roofing. Position this strip along the eaves and rakes so that it overhangs the drip edge by 1/4 to 3/8 of an inch.
Fasten the starter strip with two rows of nails: one row placed 1 inch from the eave edge, and the second row 8 inches from the edge. Space the nails 4 inches apart on center within each row.
Measure and cut your first full-width (36-inch) sheet of roll roofing.
Pro Tip: Cut your rolls into manageable 12- to 18-foot lengths. Let them sit flat in the sun for 15 to 30 minutes before installing. This “relaxes” the asphalt, preventing unsightly wrinkles, bubbles, and waves after installation.
Align the first sheet flush with the outer edges of your starter strip. Fasten only the upper edge of this sheet using galvanized roofing nails spaced 4 inches apart on center, positioned 1 inch below the top edge. The bottom and side edges will be held down by adhesive.
Spread a continuous, uniform layer of ASTM D2822 Type II asphalt plastic cement over the top 3 inches of the installed sheet. The cement layer should be between 1/8 and 1/4 of an inch thick.
Warning: Avoid applying excessive cement. Too much adhesive traps volatile gases as it cures, which causes the roll roofing to blister and crack.
Position the next course of roll roofing, overlapping the lower sheet by exactly 3 inches. Press it firmly into the cement.
When you must join two rolls end-to-end, you must create a 6-inch end lap. Ensure that the end laps in succeeding courses do not line up with each other.
For a deeper dive into professional seam sealing and technical specifications, refer to the Asphalt & SBS Roll Roofing Installation Details.
The exposed nail method is faster and uses less cement, but it should only be used on roofs with a slope of 2:12 or greater. Because the nail heads remain exposed to the elements, this method is more prone to weathering and leaks over time.
Lay down your underlayment and snap your chalk lines. Position your first full-width (36-inch) sheet of roll roofing along the eave, allowing a 1/4 to 3/8-inch overhang.
Drive nails in a row 1 inch from the eave and rake edges, spacing them 3 inches apart on center. Along the top edge, drive nails 1 inch from the edge, spaced 12 inches apart. This top row will eventually be covered by the next overlapping sheet.
Spread a 3-inch-wide band of lap cement along the top edge of the installed sheet. Lay the next course of roll roofing over the cemented area, overlapping it by 3 inches.
Nail through the overlapping seam of both sheets. Drive the nails 1 inch below the top edge of the overlap, spacing them 3 inches apart on center.
To protect your roof from moisture, apply a small dab of high-quality asphalt plastic cement over every single exposed nail head. This extra step is vital to prevent water from slowly seeping down the shank of the nail into your wood decking.
If you want to compare roll roofing with other residential methods, read our comprehensive overview of Roof Installation.

When learning how to install asphalt roofing roll, many DIYers focus entirely on the flat sections and ignore the transitions. However, over 90% of roof leaks occur at valleys, eaves, rakes, and wall penetrations.
Asphalt is highly temperature-sensitive.
If you are working on a more complex roof structure in Lenox, MA or Lanesborough, MA, traditional roll roofing may not offer the flexibility required to seal these areas safely. In these cases, it is highly recommended to upgrade to robust shingles. Learn more about your options in our guide on Asphalt Shingle Roofing.
The absolute minimum slope is 1:12 when using the concealed nail method. If you are using the exposed nail method, the minimum slope is 2:12. Roll roofing should never be installed on completely flat roofs, as standing water will eventually seep through the seams.
With proper installation and routine maintenance, an asphalt roll roof typically lasts between 5 to 8 years (up to 12 years under ideal conditions). Because of this short lifespan, it is best used as a budget-friendly option for utility buildings rather than your main home.
While it is technically possible if the old shingles are completely flat and single-layered, we highly advise against it. Old shingles create an uneven surface that prevents the seams of your roll roofing from sealing flat, leading to early wind damage and leaks. Stripping the roof to the bare deck is always the best practice. For a full breakdown of the re-roofing process, read our Roof Replacement Complete Guide.
Installing roll roofing is a fast, budget-friendly way to protect your sheds, detached garages, and outdoor structures. However, achieving a perfectly flat, watertight seal requires strict attention to detail, proper temperature management, and flawless seam sealing.
If you are dealing with a complex project, a steep slope, or if you want the peace of mind that comes with a premium workmanship warranty, hiring a professional is the safest and most cost-effective path in the long run.
At Chris Battaini Roofing and Seamless Gutters, we serve homeowners and business owners across Berkshire County — including Pittsfield, MA, Lenox, MA, and the surrounding areas. We specialize in providing top-tier Residential Roofing and commercial services with owner-led, on-site supervision and exceptional warranties.
Don’t leave your property’s protection to chance. Call us today at +413-441-4840 or fill out our online contact form to get a professional, accurate quote for your next roofing project!
Need a reliable roofer? CMB Roofing provides licensed, insured, and professional roofing services for homeowners and businesses.
We stand by a simple promise: Clear estimates. Quality workmanship. Clean job sites.
From roof repairs and full replacements to storm damage restoration, our team delivers dependable results with durable materials, expert installation, and complete site cleanup.