-
10 Wendell Ave Extension Pittsfield, MA 01201
-
210 Columbia St., Lee, MA 01238

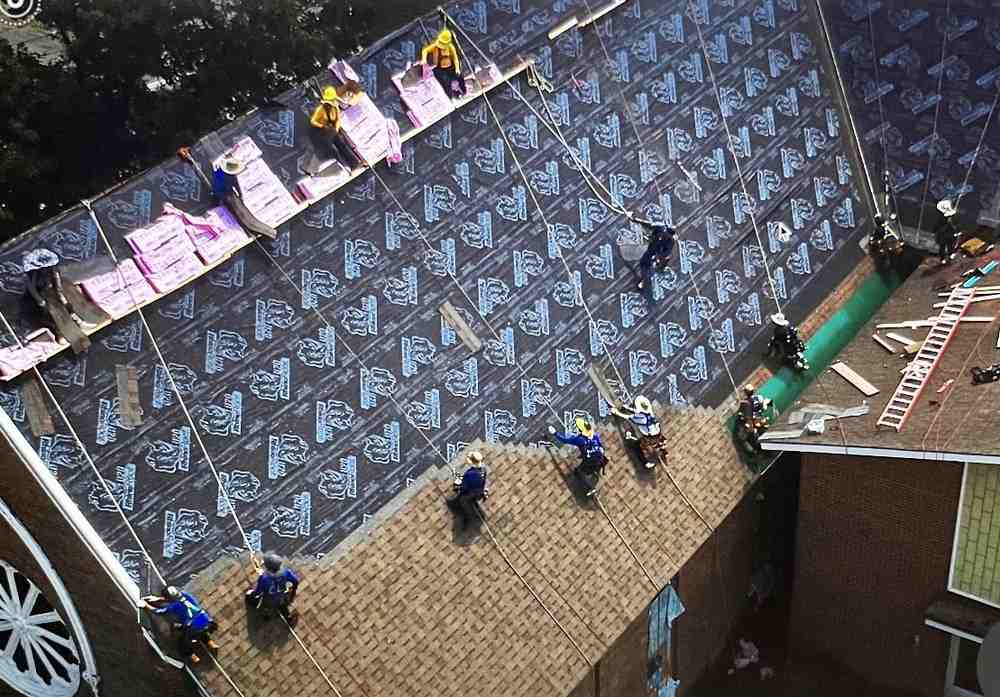
Before the first nail is ever driven, the foundation of your roof must be flawless. At Chris Battaini Roofing and Seamless Gutters (available at +413-441-4840), we know that a high-performance roof is only as good as the deck beneath it. In regions like Pittsfield MA and Dalton MA, where heavy snow loads and ice dams are seasonal realities, preparation is the most critical phase of installing architectural roof shingles.
The process begins with a total tear-off of old materials. While some codes allow for a second layer of shingles, we strongly advise against it. Removing the old shingles allows us to perform a thorough deck inspection. We look for “soft spots,” rot, or delaminated plywood. Any damaged wood must be replaced to ensure the fasteners for your new shingles have a solid substrate to bite into.
Once the deck is clean and dry, we install the drip edge along the eaves. This metal flashing directs water away from the fascia and into your gutters. Following the drip edge, we apply a self-adhesive ice and water protector. According to industry standards, this should extend at least 24 inches past the interior warm wall line of the home. This is vital for preventing leaks caused by ice damming—a common issue in Lanesborough MA and Hinsdale MA.
While traditional 15# or 30# felt was once the standard, modern high-performance systems utilize synthetic underlayment. Synthetic materials are more tear-resistant and provide a flatter surface for installing architectural roof shingles. We overlap underlayment rows by several inches and secure them with cap nails to prevent wind-up or wrinkling before the shingles are laid.
For more details on the foundational layers of your roof, explore our Asphalt Shingle Roofing Complete Guide or learn more about How to Shingle a Roof: Step-by-Step Instructions | HowStuffWorks.

Architectural shingles, also known as dimensional shingles, are designed with multiple layers to mimic the look of natural wood shakes or slate. To achieve this aesthetic and ensure maximum water shedding, you must master the staggering or “offset” pattern.
The most common method, often referred to as the “6-11-17” stagger, involves cutting specific lengths off the starting shingle of each course:
This pattern ensures that the vertical joints (seams) between shingles do not align, which would create a direct path for water to reach the roof deck. Proper alignment is also essential for the “cutouts” to look intentional and high-end.
On shorter roof sections, such as a 107-inch rake often found on additions or garages in Richmond MA, standard offsets can sometimes result in very narrow “slivers” (pieces less than 2 inches wide) at the edge. In these cases, a professional roofer will adjust the starting cuts to ensure every piece is wide enough to be properly nailed. For a deeper dive into layout strategies, see Everything You Need To Know About Roof Installations.
Nailing is where many DIY projects fail. Architectural shingles have a specific “nailing zone”—usually a narrow strip located just below the adhesive sealant.
Improper nailing is the leading cause of shingle blow-offs during New England storms. You can find more technical tips in our Nail It The Ultimate Guide To Shingle Installation.
The weather in Windsor MA and Savoy MA dictates when we can work. For optimal results, installing architectural roof shingles should occur when temperatures are between 45°F and 85°F.

Valleys are the most vulnerable points on any roof because they collect and channel high volumes of water. When installing architectural roof shingles, we generally recommend the Open Metal Valley method.
Once the main planes of the roof are covered, the ridges and hips must be capped. You cannot use standard shingles for this; you must use specialized ridge cap shingles designed to fold over the peak. These are installed starting from the end of the ridge opposite the prevailing winds. Each cap overlaps the previous one by about 5 to 6 inches, covering the nails of the piece below.
Avoiding common mistakes ensures your roof lasts its full 30-year lifespan. One of the most overlooked aspects is attic ventilation. FHA Minimum Property Standards require 1 square foot of net free vent area for every 150 square feet of attic floor. Without this, heat builds up, “baking” the shingles from the inside out and voiding your warranty.
| Feature | Open Metal Valley | Closed-Cut Valley |
|---|---|---|
| Durability | Highest – Metal resists wear better than asphalt | Moderate – Shingles can erode over time |
| Debris Shedding | Excellent – Smooth surface clears leaves easily | Fair – Shingle edges can catch debris |
| Aesthetics | Professional, high-contrast look | Seamless, blended look |
| Best For | Heavy Snow/Ice (Berkshire County) | Standard residential slopes |
Other common errors include skipping the starter strip (which leads to wind uplift at the eaves) or failing to provide a 1/2-inch overhang at the drip edge. For a comprehensive list of what to watch for, see our Complete Asphalt Shingle Replacement Guide.
While it may seem like a cost-saving measure, we do not recommend “nail-overs.” Adding a second layer of architectural shingles adds immense weight to your home’s structure. Furthermore, you cannot inspect the deck for rot, and the uneven surface of the old shingles will prevent the new ones from sealing properly. Most manufacturer warranties are also voided or severely limited in overlay scenarios. If you are dealing with leaks now, a “patch” isn’t enough; see our guide on Asphalt Shingle Roof Repair.
For a professional crew, a typical residential roof (1,500 to 2,000 square feet) in Great Barrington MA usually takes two to three days. This includes the tear-off, deck repair, and full installation. DIY installations can often take a week or more, leaving your home vulnerable to New England’s unpredictable weather. Check out more on the Roof Installation timeline.
Based on industry averages and online data, the cost of a full roof replacement can vary significantly depending on the complexity and size of the structure. In 2026, you can expect average costs to range from $15,000 to $80,000. These figures are sourced from publicly available internet data and are not the actual prices of Chris Battaini Roofing. Factors such as the pitch of the roof, the number of valleys, and the removal of multiple old layers will influence the final price. For more context, visit our Asphalt Shingle Roof Cost Guide.

Installing architectural roof shingles is a sophisticated process that requires more than just a hammer and a ladder. It requires an understanding of New England weather, manufacturer specifications, and structural integrity. From the initial deck inspection in Adams MA to the final ridge cap in Williamstown MA, every step must be executed with precision.
At Chris Battaini Roofing and Seamless Gutters, we pride ourselves on owner-led, on-site service. We don’t just “oversee” the job; we ensure every shingle meets our exceptional workmanship standards. Whether you are in Pittsfield MA, Lanesborough MA, North Adams MA, Peru MA, or Stockbridge MA, we are here to provide a roof that protects your family for decades.
Don’t leave your home’s most important defense to chance. While DIY is an option for small sheds or playhouses, your home deserves professional care and a warranty that actually means something.
Need a reliable roofer? CMB Roofing provides licensed, insured, and professional roofing services for homeowners and businesses.
We stand by a simple promise: Clear estimates. Quality workmanship. Clean job sites.
From roof repairs and full replacements to storm damage restoration, our team delivers dependable results with durable materials, expert installation, and complete site cleanup.