

What You Need to Know About Roof Installation
Thinking about a new roof? You’re about to start on one of the most important home improvement projects you’ll ever tackle. A roof installation isn’t just about keeping the rain out—it’s your home’s first line of defense against Mother Nature while boosting your property’s energy efficiency and curb appeal.
Here at Chris Battaini Roofing, we’ve guided countless homeowners through this process, and I’d love to walk you through what’s involved in a proper roof installation.
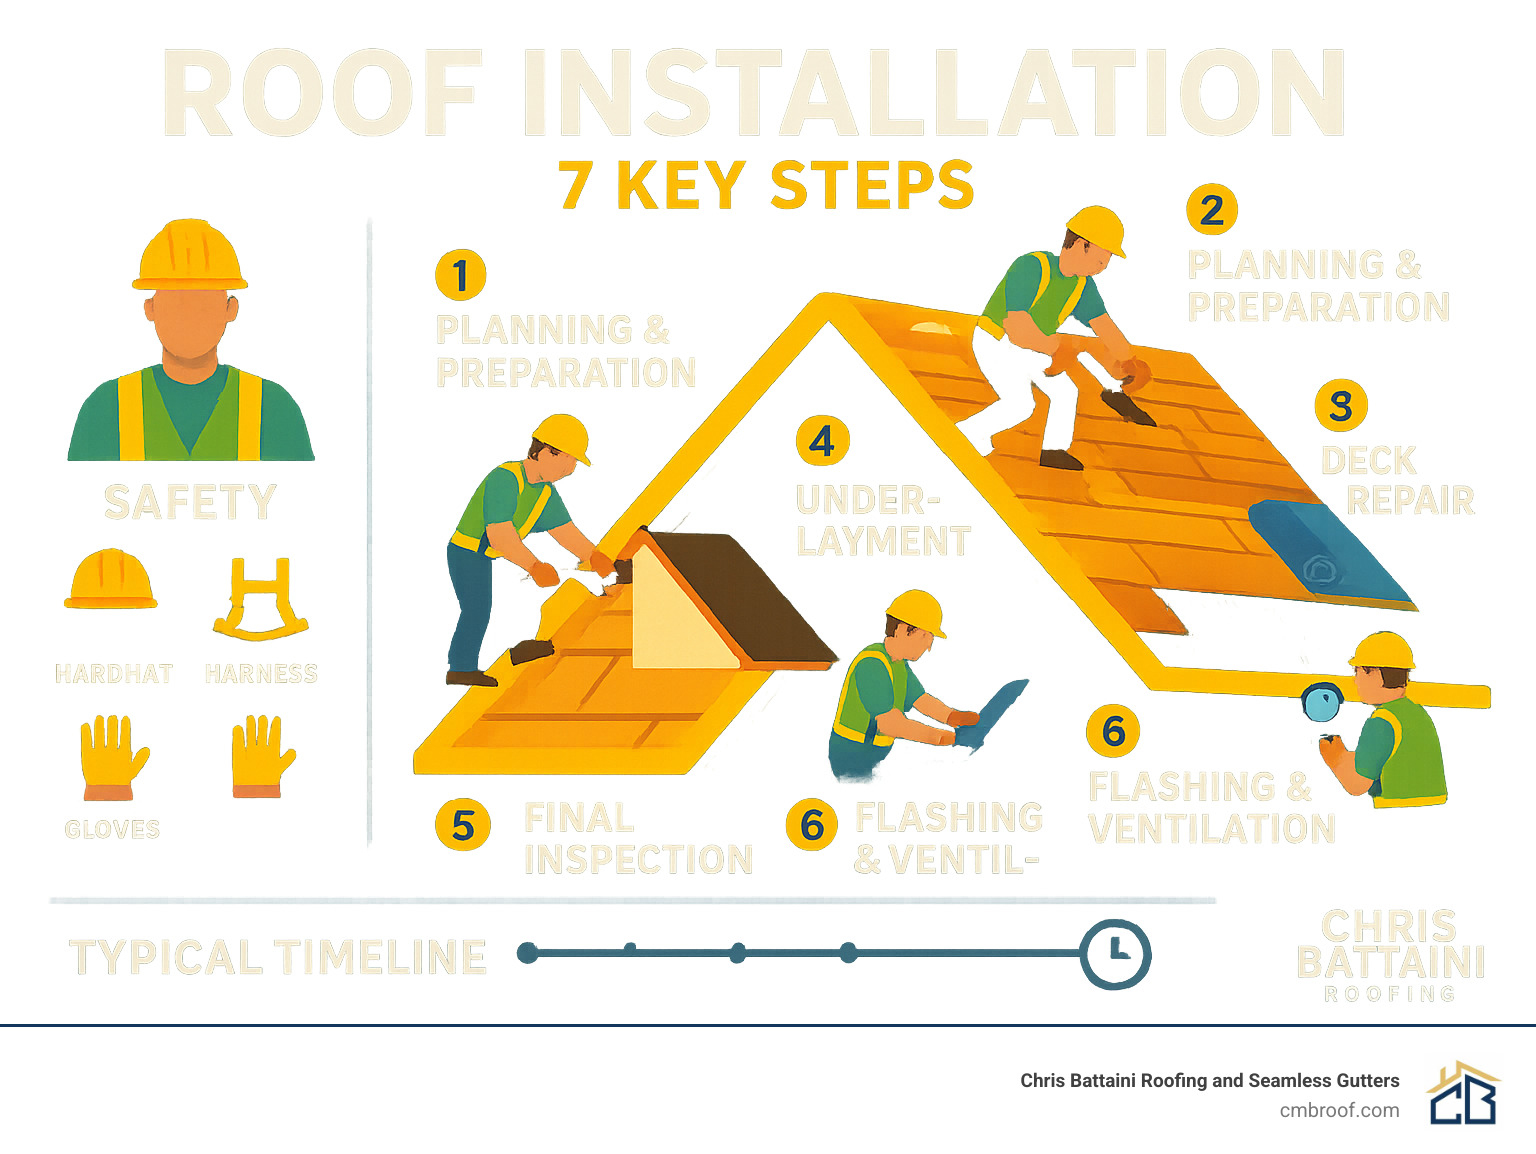
The journey to your new roof follows a carefully orchestrated path. It starts with thorough planning and preparation—securing those necessary permits, gathering safety equipment, and preparing your property for the work ahead. Next comes the tear-off phase, where we remove all the old roofing materials right down to the decking. This gives us the chance to perform a comprehensive deck inspection, replacing any damaged plywood or sheathing that might compromise your new roof.
Once we have a solid foundation, we install the underlayment—those critical water barriers, felt paper, and drip edges that form your roof’s first layer of protection. Then comes the exciting part: applying your chosen roofing material, starting with starter strips along the edges before moving to the main field.
Proper flashing around chimneys, vents, and valleys, along with adequate ventilation, might not be the most visible elements of your new roof, but they’re absolutely essential for its longevity. We finish with a thorough clean-up and final quality inspection to ensure everything meets our exacting standards.
Did you know that a properly installed roof can boost your home’s energy efficiency by up to 30%? That’s real savings on your energy bills while enjoying decades of protection overhead.
“Improper nailing is the leading cause of roof failures in storms.” – Industry finding
When it comes to safety, we never cut corners. While professional roofers like us consider any roof pitch lower than 8/12 to be walkable, DIYers should stick to pitches of 6/12 or less. And here’s a pro tip: each shingle should be secured with at least four nails, but in our wind-prone areas, we typically use six nails per shingle for maximum security.
One often overlooked aspect of roof installation is proper attic ventilation. Adding the right ventilation system during your roof replacement can extend shingle life by up to 10 years—that’s why we consider it an essential component, not an optional add-on.
While DIY roof installation might seem tempting for simple, low-pitch roofs, most homeowners find that professional installation provides peace of mind, maintains manufacturer warranties, and ultimately delivers better results. The average installation takes several days, varying with your home’s size, roof complexity, and (of course) the weather. But don’t worry—we follow a systematic approach that ensures proper water drainage and maximizes the life of your new roof.
Want to learn more about our approach to roof installation? We’d be happy to provide a free consultation and estimate for your home in Berkshire, Hampden, Hampshire, or Franklin Counties.
Planning, Safety & Preparation
Starting on a roof installation journey requires thoughtful planning and careful preparation. At Chris Battaini Roofing and Seamless Gutters, we’ve seen how the right groundwork transforms a potentially stressful project into a smooth, efficient experience.
Permits and Weather Planning
Before climbing any ladders, check with your local building department about permits. Most towns across Berkshire County and Southern Vermont require official paperwork before you replace your roof. The weather plays an equally important role in timing your project.
“We always keep a close eye on the forecast for at least a week before scheduled installations,” says Chris Battaini. “Even a 40% chance of rain can throw off our timeline, which is why we build in flexibility for every project.”
The ideal conditions for roof installation fall between 50-80°F with clear skies. This ensures proper sealing of materials and comfortable working conditions for our crews.
Property Preparation
Your home’s surroundings need as much attention as the roof itself. A well-prepared property makes the installation process safer and cleanup much easier.
Before our team arrives, consider mowing your lawn short—this makes fallen nails much easier to spot during cleanup. Move those patio chairs, grills, and potted plants away from the work zone. Your vehicles will appreciate being parked on the street rather than risking an accidental ding or dusty coating.
Valuable landscaping deserves protection with tarps, while sprinkler heads and landscape lighting should be clearly marked. And don’t forget to document your property’s condition beforehand—it’s always smart to have “before” photos of your driveway and home exterior.
Safety Gear & Codes
There’s nothing more important than safety during a roof installation. OSHA doesn’t create regulations for fun—they save lives. When our teams climb above six feet, they’re equipped with comprehensive fall protection systems including harnesses and guardrails.
Hard hats protect against falling debris, while steel-toed boots provide both traction and toe protection. Safety glasses shield eyes from dust and debris, and proper gloves prevent painful cuts and scrapes.
For DIYers tempted to skip safety gear, one of our veteran team members puts it perfectly: “After my close call years ago, I learned that a harness is a lot cheaper than a hospital stay.” Words to live by—literally.
Measuring & Ordering Materials
Accurate measurements prevent the two worst scenarios in roofing: running short of materials mid-job or wasting money on excess supplies. Here’s our tried-and-true approach:
Measure each roof section’s length and width, then multiply them for the area in square feet. Add all sections together and divide by 100 to determine “squares”—the standard roofing measurement unit. For asphalt shingles, each square requires three bundles. Always add 10-20% extra for waste, complex cuts, and starter shingles.
For instance, a 30 × 40 foot roof equals 1,200 square feet or 12 squares. That’s 36 bundles of shingles, plus the waste factor, bringing your total to 40-43 bundles. Don’t forget to measure your ridge length for calculating ridge cap shingles too!
Material Comparison
| Material | Lifespan | Cost Range* | Best For |
|---|---|---|---|
| Asphalt Shingles | 20-30 years | $100-300/square | Budget-conscious homeowners |
| Metal Roofing | 40-70 years | $300-1,200/square | Durability, energy efficiency |
| Cedar Shakes | 30-40 years | $400-900/square | Natural aesthetic, insulation |
*Average costs based on internet data, not actual costs for Chris Battaini Roofing and Seamless Gutters.
Tool Checklist
A professional roof installation requires specialized tools that most homeowners don’t have lying around the garage. You’ll need roofing nailers or hammers, pry bars and roofing shovels for tear-off, utility knives, tin snips, and chalk lines for proper alignment.
Don’t forget ladders and scaffolding, magnetic sweepers for nail cleanup, and tarps for catching debris. For pneumatic tools, you’ll need compressors and hoses too.
The good news? When you work with Chris Battaini Roofing and Seamless Gutters, we bring all these professional-grade tools to your job site. Our fully-equipped crews arrive ready to work efficiently while maintaining our high standards for quality installation.
More info about Roofing and Guttering Services
Tear-Off, Deck Repair & Underlayment
The foundation of a solid roof installation begins with properly removing old materials and thoroughly preparing the deck. This critical phase truly sets the stage for everything that follows—skimp here, and you might be looking at problems for years to come.
Removing Old Layers
When we arrive at your home to start the tear-off, our first priority is protecting your property. We carefully place tarps around your home’s perimeter to catch debris and shield your landscaping from damage.
“The tear-off phase is where we often find surprises,” notes Chris Battaini. “What looks like a simple replacement can reveal hidden issues once we get down to the decking.”
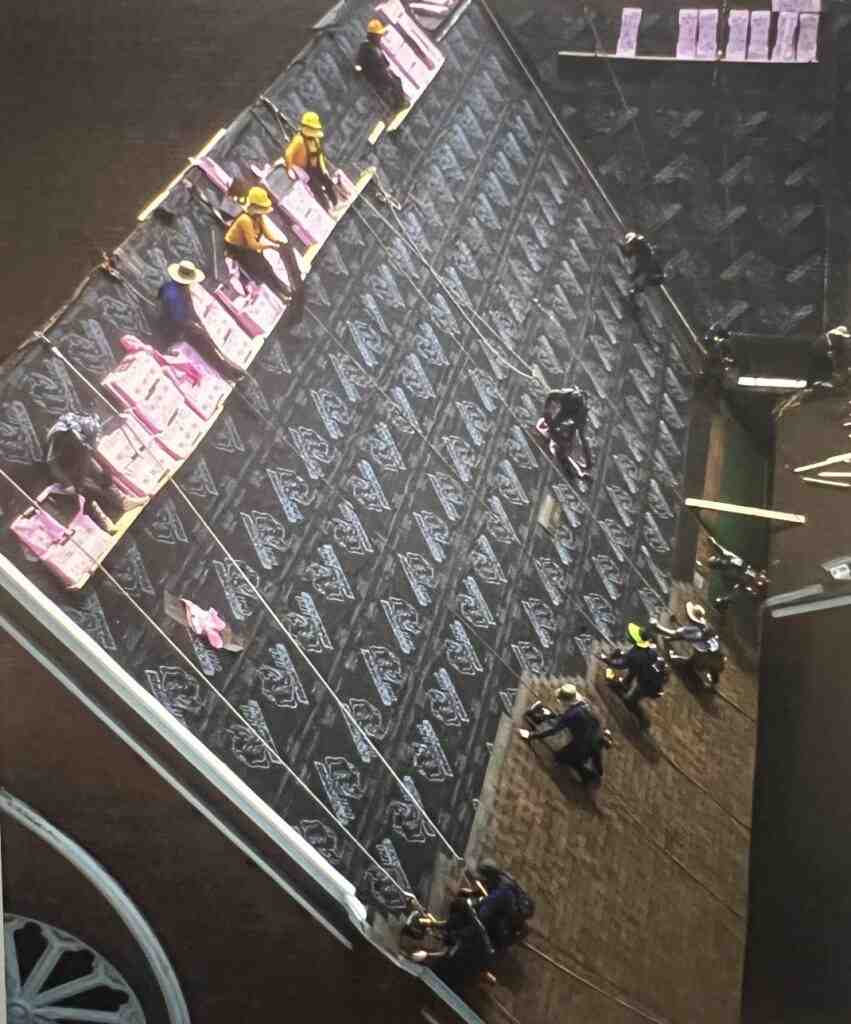
We work methodically from the peak down in sections, using specialized roofing forks and shovels to pry up the old materials. Every shingle, piece of underlayment, and bit of flashing must go. We pay extra attention to valleys and roof penetrations where leaks commonly start.
Once the shingles are removed, we either pull out all roofing nails or pound them flat. Then we sweep the roof deck completely clean, leaving a smooth surface for the new roof.
A typical 2,000-square-foot roof generates about 2-3 tons of waste—that’s roughly the weight of a midsize SUV! We always arrange proper disposal through designated dumpsters or debris chutes, keeping your property clean throughout the process. After tear-off, we always conduct a thorough “nail sweep” of your yard using magnetic tools to protect your family, pets, and vehicle tires.
Deck Repair Essentials
With the old roof gone, we can now inspect every inch of your roof deck—the plywood or boards that form the foundation of your roofing system. We’re looking for several key issues:
Water damage appears as dark stains, soft spots, or rotting wood. Warped or split sheathing needs immediate attention, as do any loose fasteners or popped nails. We also check for proper rafter spacing (typically 16″ or 24″ on center) and ensure there are adequate ventilation openings.
Any compromised sheathing must be replaced before we proceed. We use only code-approved exterior-grade plywood or OSB of matching thickness. For proper support, all plywood seams must fall on rafters and be secured with appropriate fasteners.

“We’ve seen too many roofs fail because someone skimped on deck repairs,” says Chris. “Saving a few hundred dollars now could cost thousands in repairs later.”
Underlayment Installation
The underlayment is your roof’s second line of defense against water infiltration. In our harsh New England climate, this multi-layer system is absolutely crucial.
We start with the drip edge—metal flashing installed along eaves and rakes to direct water away from your fascia and into gutters. The drip edge goes on at the eaves first, then along the rakes after the underlayment.
Next comes the ice and water shield, a self-adhering waterproof membrane that we apply in several critical areas: along eaves (minimum 24″ past interior wall line), in valleys (36″ wide minimum), around chimneys, skylights, and other penetrations, and in areas prone to ice dams.
In Berkshire County and Southern Vermont, where we experience heavy snow and ice dams, proper ice and water shield installation is especially important. We typically extend it 6-8 feet up from the eave edge, exceeding minimum code requirements.
Finally, we cover the entire roof deck with roofing felt or synthetic underlayment, with horizontal overlaps of 2-4 inches and vertical overlaps of at least 6 inches. We secure it with cap nails to prevent tearing in the wind.
“We’ve seen too many roofs fail because someone skimped on underlayment,” says Chris. “It’s like building a house without a foundation—eventually, it will fail.”
For more detailed information on our superior roofing materials and installation methods, check out our Asphalt Shingle Roofing page. And if you’re curious about how long different roofing materials last, industry statistics on roofing durability show that proper installation can significantly extend your roof’s lifespan.
Roof Installation: Shingles, Flashing & Ventilation
With preparation complete, we move to the heart of the roof installation process – the part where your roof truly takes shape. At Chris Battaini Roofing, this is where our craftmanship really shines through careful application, proper sequencing, and attention to those small details that make a big difference.
Roof Installation Safety Checklist
Safety never takes a back seat, even when we’re in the flow of installation. Our crews follow a strict safety protocol that includes wearing proper harnesses, rubber-soled boots for better grip (especially important on those steeper pitches), and gloves to protect against sharp edges.
“I tell my team that the best roofers are the ones who make it home safely every night,” Chris often says. During summer installations, we’re particularly mindful of heat safety, scheduling regular breaks and ensuring everyone stays hydrated. Clear communication between ground and roof teams prevents accidents and ensures materials arrive where they’re needed when they’re needed.
Roof Installation Nail Pattern & Alignment
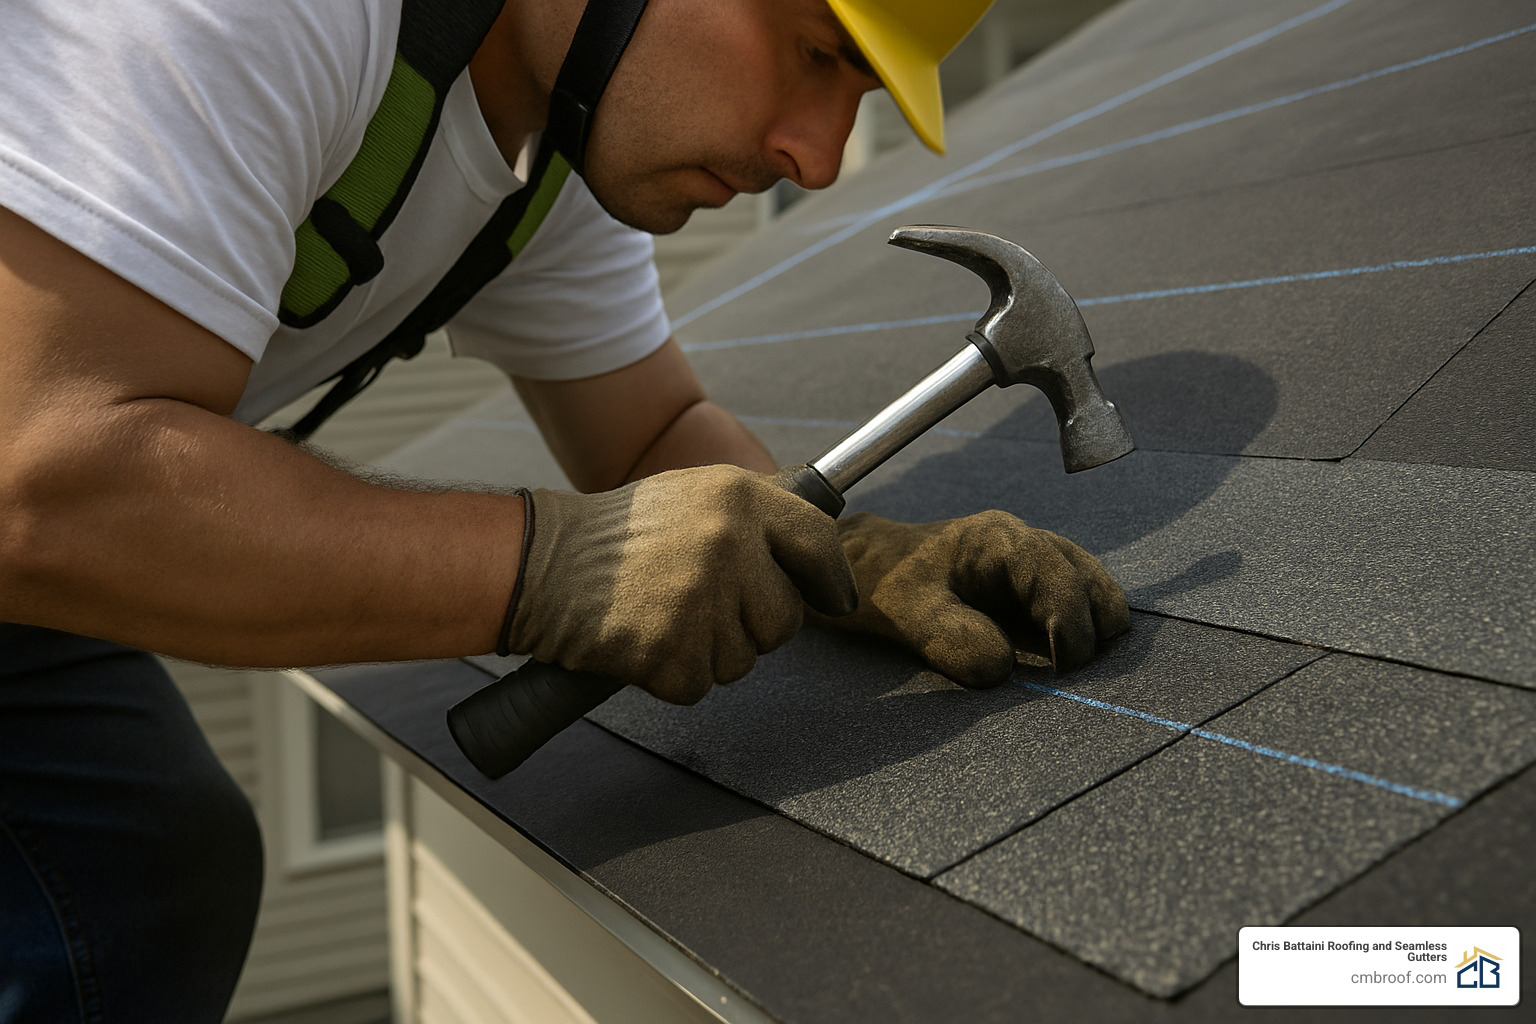
The humble roofing nail might seem insignificant, but proper nailing is actually the backbone of a durable roof installation. We’ve seen too many roofs fail during storms simply because someone rushed this critical step.
For standard asphalt shingles, we use four nails per shingle, placed 1-2 inches above the cutout. In high-wind areas or on steeper slopes, we bump that up to six nails for extra security. Each nail must penetrate at least ¾ inch into the deck and sit flush with (never cutting into) the shingle surface.
Alignment creates both beauty and functionality. We begin with starter strips along the eaves, carefully overhanging them by ½ inch beyond the drip edge. To maintain straight lines, we snap chalk lines every few rows – this extra step prevents the waviness that often betrays amateur installations. Proper staggering of shingle seams (minimum 4″ offset) ensures water flows properly without creating channels that could lead to leaks.
Flashing & Leak Barriers
If shingles are your roof’s first line of defense, flashing is the specialized force that protects the most vulnerable areas. Each type of flashing serves a specific purpose in your roof installation.
Step flashing creates a water-tight seal where your roof meets walls or chimneys. These L-shaped metal pieces interweave with shingles, each overlapping the previous by at least 2 inches. We extend each piece at least 4 inches up the wall and 4 inches onto the roof for maximum protection.
Valley flashing deserves special attention since valleys channel large amounts of water. We prefer open valleys with W-shaped metal flashing, secured with clips rather than nails in the center (which could create leak points). For added protection, we always underlay valleys with ice and water shield – call it our “belt and suspenders” approach.
Around pipes and vents, we install properly sized boots with flexible rubber or metal collars. The upper portion tucks under shingles while the lower portion lays over them, creating a natural water flow path.
Chimney flashing is particularly complex, requiring base flashing, step flashing, and counter flashing mortared into the chimney itself. For chimneys wider than 30 inches, we add a cricket or saddle to prevent water pooling.
“I can spot an amateur roof from a mile away just by looking at the flashing details,” Chris often remarks. “That’s where most leaks develop, and it’s where we invest extra time to get things right.”
Ventilation & Vents
Many homeowners don’t realize that proper ventilation can extend shingle life by up to 10 years while reducing energy costs. A balanced system needs both intake and exhaust components working together.
Intake ventilation allows fresh air to enter the attic through soffit vents with proper baffles to prevent insulation blockage. In homes without soffits, we might recommend fascia vents to achieve the same purpose.
For exhaust ventilation, ridge vents running along the peak provide maximum efficiency and a clean look. In specific situations, box vents (sometimes called turtle vents) or power/solar vents might be appropriate for additional airflow.
We follow the general rule of 1 square foot of net free ventilation area per 150 square feet of attic floor space (or 1:300 if both intake and exhaust are perfectly balanced).
During your roof installation, we ensure all ventilation components work as a system. Ridge vents include proper external baffles to prevent weather infiltration, and we verify that bathroom and kitchen vents exhaust to the exterior rather than into the attic space where moisture could cause problems.
“We’ve removed roofs that were only 10 years old but failed due to heat buildup and moisture damage,” says Chris. “When we explain the science behind proper ventilation, our customers understand why we consider it non-negotiable for a long-lasting roof.”
For more information about our metal roofing options, which have special ventilation considerations, visit our Metal Roofing page.
Finishing Touches: Cleanup, Costs & Timeline
As your roof installation nears completion, we focus on those final critical steps that ensure your roof’s integrity and your property’s protection. This is where attention to detail truly matters.
Ridge Caps and Hip Shingles
The ridge caps and hip shingles aren’t just decorative elements – they provide essential weather protection at your roof’s most vulnerable points while adding that finished, professional appearance.
“Ridge caps are like the crown on your roof,” Chris explains with a smile. “They’re the final piece that ties everything together while providing crucial protection at the peak.”
We carefully install each ridge cap, starting with proper placement of ridge vents if they’re part of your ventilation plan. We secure these special shingles with longer nails (typically 1¾”) and maintain precise overlaps according to manufacturer specifications. Any exposed nail heads get a protective seal of roofing cement – a small detail that prevents big problems down the road.
Cleanup & Final Inspection
At Chris Battaini Roofing and Seamless Gutters, we believe a thorough cleanup isn’t just a courtesy – it’s the hallmark of professional roof installation. We remove all debris from your roof surface, collect materials from protective tarps, and perform multiple magnetic sweeps of your yard to collect even the smallest nails or metal fragments.
We don’t overlook your gutters either, carefully cleaning out any shingle granules or debris that may have accumulated during installation.
“We’re not finished until the yard is cleaner than when we arrived,” says Chris. “Our final inspection is methodical—we check every detail before considering the job complete.”
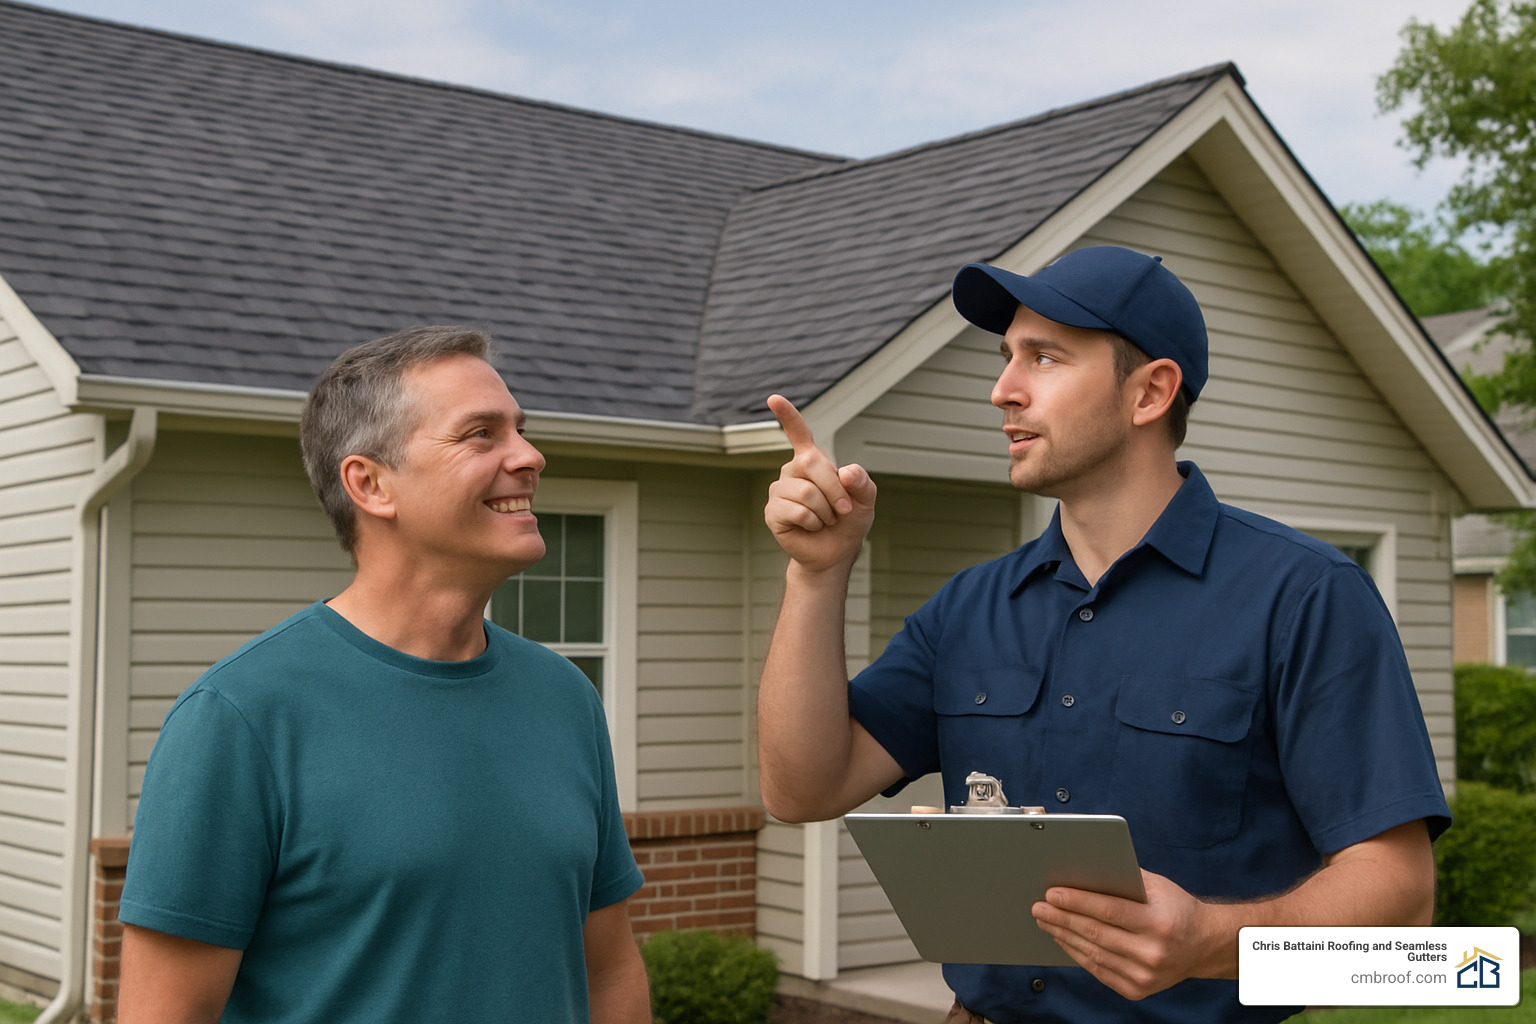
This inspection includes checking for proper shingle alignment, secure flashing at all penetrations, complete nail coverage, proper sealing of exposed fasteners, even color blending, and intact drip edge with proper gutter alignment. We’re looking for perfection because that’s what your home deserves.
Typical Costs & Duration
“How long will my roof take?” is one of the most common questions we hear. The truth is, it depends on several factors:
A simple ranch-style home might take just 1-2 days, while a complex multi-level home could require 4-7 days of work. Here in New England, weather conditions can add unpredictable delays (we never install in the rain – it’s dangerous and compromises quality). Finding unexpected deck damage can add 1-2 days for proper repairs, and special order materials sometimes extend project timelines.
As for cost factors, materials typically represent about 40% of the total project cost, with labor making up the remaining 60%. Complexity matters too – steep pitches, multiple levels, and numerous penetrations increase labor costs. Difficult-to-access roofs may require additional equipment or time.
Based on internet data (not actual costs for Chris Battaini Roofing and Seamless Gutters), average roof replacement costs range from $5,000 for a simple asphalt shingle roof on a small ranch home to $30,000+ for premium materials on larger, more complex homes.
Warranties & Guarantees
A professional roof installation should always include comprehensive warranty coverage. Manufacturer warranties typically cover material defects for 20-50 years (depending on shingle grade), color fading, granule loss, and wind resistance (usually 110-130 mph for most architectural shingles).
Our workmanship warranty at Chris Battaini Roofing and Seamless Gutters covers installation defects, water infiltration issues, and flashing failures – because we stand firmly behind our work.
“We register manufacturer warranties for our customers and provide detailed documentation of our workmanship warranty,” explains Chris. “A roof is a significant investment, and we stand behind our work.”
To maintain your warranty coverage, keep all project documentation, follow manufacturer maintenance guidelines, address any issues promptly, and schedule periodic professional inspections. We’re happy to help with these follow-up services too.
Chris Battaini Roofing and Seamless Gutters proudly services Berkshire, Hampden, Hampshire, and Franklin Counties in Massachusetts, bringing our exceptional attention to detail to every roof installation we complete.
More info about Warranty & Guarantee
Conclusion & FAQs
A successful roof installation does more than just cover your home—it provides decades of protection, energy efficiency, and peace of mind. Throughout this guide, we’ve walked through the complex process from planning to completion, highlighting the importance of quality materials, proper techniques, and attention to detail.
When it comes to protecting your biggest investment, cutting corners simply isn’t worth the risk. At Chris Battaini Roofing and Seamless Gutters, we understand that your home deserves the very best. That’s why Chris himself is on-site for every project, ensuring our exacting standards are met from tear-off to final clean-up.
“I treat every home as if it were my own,” Chris often says. “That means no shortcuts, no compromises, and no leaving until everything is perfect.”
Ready to discuss your roofing needs? We’d love to provide a free, no-obligation consultation and estimate. Our team proudly serves homeowners throughout Berkshire, Hampden, Hampshire, and Franklin Counties in Massachusetts, as well as our neighbors in Southern Vermont.
Frequently Asked Questions about Roof Installation
FAQ #1 – How long does a roof installation take?
The timeline for a complete roof installation typically ranges from 1-5 days for most homes. Several factors influence this timeline:
Your home’s size and roof complexity play a major role—a simple ranch might be completed in a day, while a Victorian with multiple dormers could take nearly a week. Weather conditions can either help us move quickly or force delays (safety always comes first). The extent of necessary repairs finded during tear-off can add time, as can the availability of specialty materials.
At Chris Battaini Roofing, we pride ourselves on efficiency without sacrificing quality. We’ll provide you with a detailed timeline before work begins and keep you updated throughout the process. Most standard homes in our service area are completed within 2-3 days, allowing you to quickly return to normal life with your beautiful new roof overhead.
FAQ #2 – What roof installation mistakes should I avoid?
After decades in the roofing business, we’ve seen just about every roof installation mistake possible. The most common issues include improper nailing (too high, too low, or overdriven), which can cause shingles to fail during the first strong wind. Inadequate underlayment is another frequent problem—skimping on ice and water shield in our New England climate is asking for trouble when winter arrives.
Poor ventilation might not show immediate problems, but it silently damages your roof from underneath, potentially voiding manufacturer warranties and drastically shortening shingle life. Improper flashing around chimneys, valleys, and wall intersections is perhaps the most common source of roof leaks we repair. Finally, mixing materials from different manufacturers can create compatibility issues that compromise your roof’s integrity.
“The most expensive mistakes are the ones that hide until it’s too late,” Chris often reminds homeowners. “Proper technique and quality materials throughout the entire system aren’t just best practices—they’re essential protections for your home and wallet.”
FAQ #3 – Should I DIY or hire a professional for my roof installation?
The DIY approach to roof installation certainly has appeal for handy homeowners looking to save on labor costs. However, before climbing that ladder, consider some important factors.
DIY roofing comes with significant safety risks, especially on steeper pitches. You’ll need proper equipment—not just tools but safety gear and fall protection—which can be costly for a one-time project. Many manufacturer warranties actually require professional installation to remain valid. Even experienced DIYers typically take 2-3 times longer than professionals to complete the job, and the potential for costly mistakes looms large when you’re learning as you go.
Professional installation brings peace of mind through safety expertise and proper equipment. Our experienced crews work efficiently with the quality workmanship that comes from daily practice. You’ll receive full manufacturer and workmanship warranties that protect your investment for decades. When unexpected issues arise—and they almost always do—professionals know exactly how to handle them without compromising your roof’s integrity.
“We often get calls from homeowners who started DIY projects and realized they were in over their heads,” Chris shares with a smile. “There’s absolutely no shame in recognizing when a job requires professional expertise.”
For most homeowners, professional installation provides the best long-term value, ensuring your roof will protect your home through decades of New England weather. At Chris Battaini Roofing and Seamless Gutters, we take pride in delivering exceptional quality and service on every roof installation project throughout Berkshire, Hampden, Hampshire, and Franklin Counties in Massachusetts.
