

Why Proper Drip Edge Installation Metal Roof Protection Matters
Drip edge installation metal roof projects protect your biggest investment from water damage, pest intrusion, and costly repairs. While metal roofs are incredibly durable, their edges remain vulnerable without proper flashing.
Quick Installation Overview:
1. Measure roof perimeter and order materials
2. Install at eaves – under underlayment, 12″ fastener spacing
3. Install at rakes – over underlayment, 2″ overlaps
4. Secure corners with 45° cuts and proper sealing
5. Test alignment with gutters for proper water flow
The stakes are high. Without drip edge, water can:
– Seep behind fascia boards causing rot
– Create ice dams in winter
– Allow pests to nest under roof edges
– Void your roof warranty
Building codes now require drip edge installation on most North American roofs. The International Residential Code mandates it extends at least 1/4 inch below roof sheathing with fasteners every 12 inches.
Cost ranges vary widely based on internet data – DIY materials run $250-$500 for a typical 150-foot roofline, while professional installation averages $3-$7 per linear foot (though high-end projects can reach $15+ per foot). These are average internet costs, not actual pricing for Chris Battaini Roofing and Seamless Gutters.
Drip edge installation metal roof terms to know:
– attaching metal roofing
– metal roofing installation
What Is a Drip Edge and Why Metal Roofs Need It
Picture this: you’ve invested thousands in a beautiful new metal roof, but water is somehow finding its way behind your fascia boards. The culprit? A missing or poorly installed drip edge.
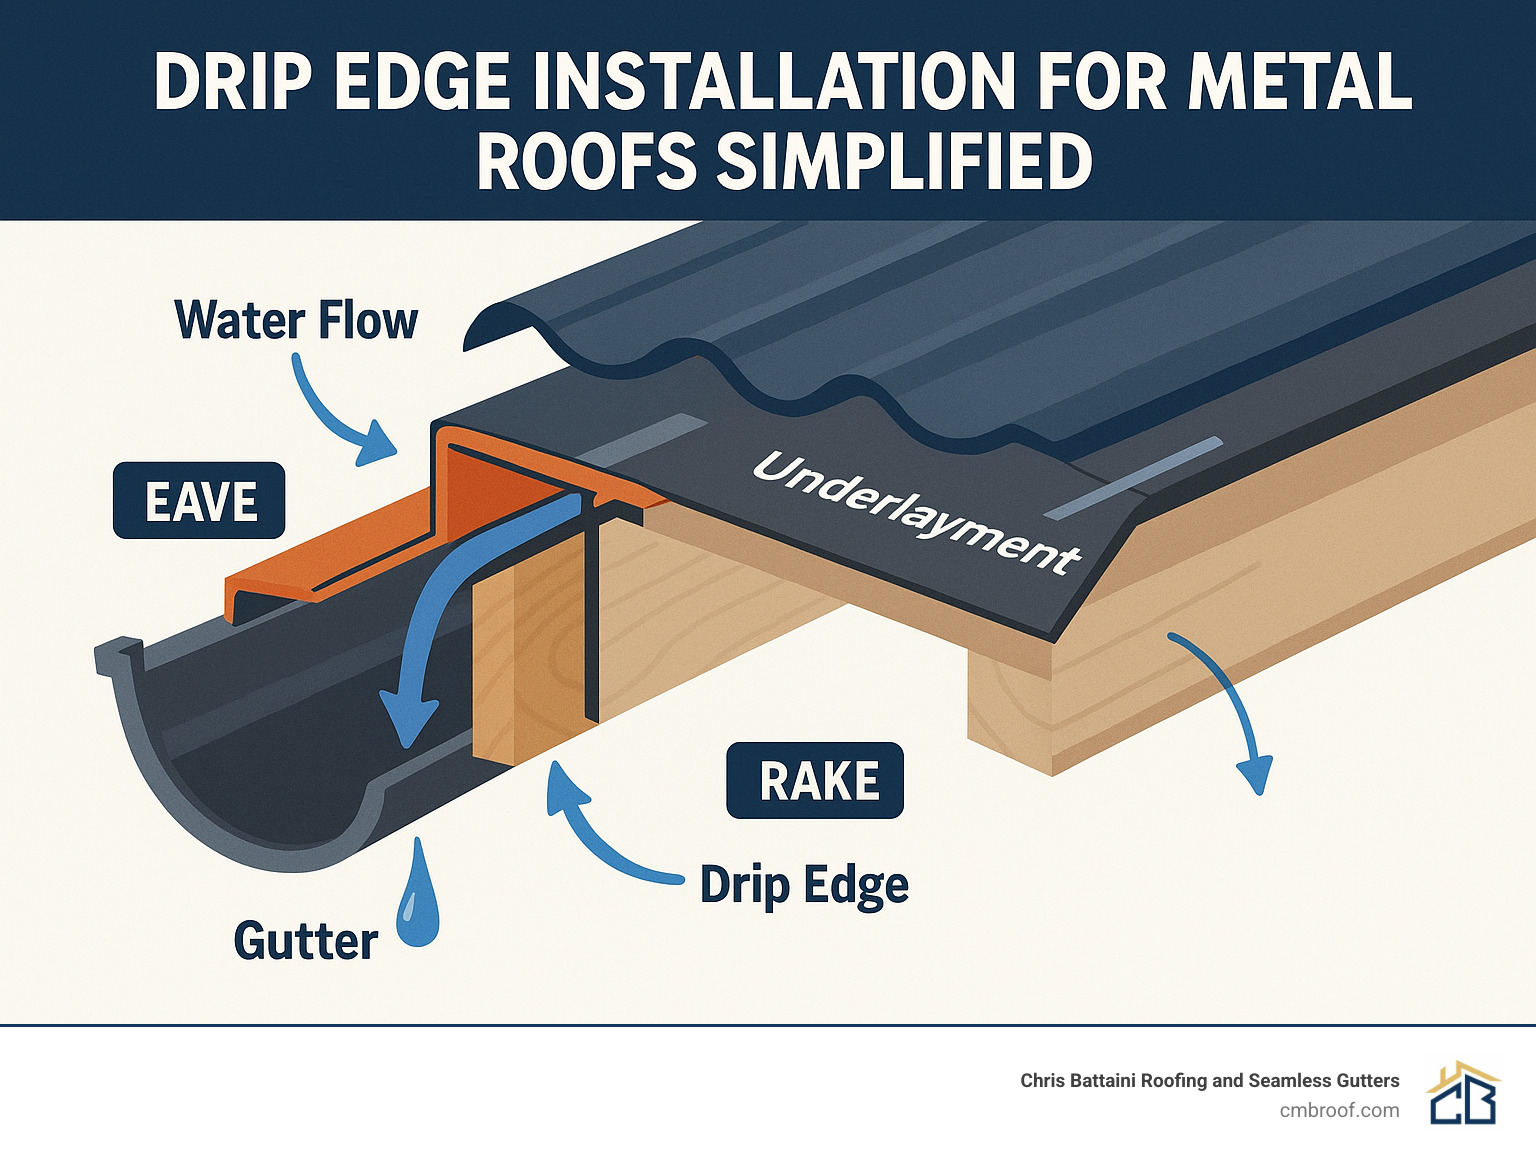
A drip edge is simply a metal strip that runs along your roof’s perimeter, designed to guide water away from vulnerable wood components and straight into your gutters. Think of it as your roof’s wingman – it might not get the glory, but it’s doing the heavy lifting to keep everything working smoothly.
Here’s what happens without one: Water loves to stick to surfaces due to surface tension. Without a drip edge, rainwater clings to your roof edge and sneaks backward under your roofing materials. Before you know it, you’re dealing with fascia rot, deck deterioration, and repair bills that’ll make your wallet weep.
Building codes caught onto this problem years ago. Most jurisdictions now require drip edge installation metal roof projects because the data is clear – proper installation prevents up to 90% of water intrusion issues at roof edges.
Metal roofs face unique challenges that make drip edges even more critical. Wind-driven rain can actually be forced upward under metal panels during storms. Ice buildup at edges creates damming effects that can push water in directions it was never meant to go.
There’s another bonus most folks don’t think about – pest control. A properly installed drip edge seals that gap between your roof deck and fascia, blocking carpenter bees, termites, and even woodpeckers from setting up shop.
How a Drip Edge Works
The engineering behind drip edges is surprisingly neat. A properly installed drip edge creates what’s called a “capillary break” – fancy talk for interrupting the surface tension that lets water cling and travel where it shouldn’t.
Here’s the magic sequence: Water runs down your metal panels and hits the drip edge, which channels the flow to its outer hem. At that point, the drip edge forces the water to let go and drop cleanly into your gutters instead of wrapping around to reach your fascia.
Key Benefits for Metal Roofs
Edge stiffness becomes crucial with metal roofing systems. Those large metal panels can flex and vibrate when wind picks up, and the unsupported edge is the most vulnerable spot. A properly secured drip edge adds structural support right where you need it most.
Your gutters will thank you too. Without a drip edge, water can overshoot your gutters entirely or, worse yet, drip behind them where it can cause foundation issues. The controlled water release from a drip edge maximizes your gutter system’s efficiency.
Ice dam defense is especially important here in New England. Drip edges help prevent the ice buildup that can force water back under your roofing materials during those brutal winter freezes.
Choosing the Right Drip Edge for Metal Roofs
Material selection directly impacts longevity and performance. We’ve seen too many installations fail because someone chose the cheapest option without considering compatibility.
Aluminum drip edge remains the most popular choice. It’s lightweight, corrosion-resistant, and available in thicknesses from .032 to .063 inches. The .040 thickness provides the best balance of cost and durability for most residential applications.
Galvanized steel offers superior strength and is required to be minimum 24-gauge to withstand strong winds. It’s heavier than aluminum but provides excellent structural support for large overhangs.
Copper drip edge must be at least .69mm (20 oz) thick according to industry standards. While expensive, it’s virtually maintenance-free and develops an attractive patina over time.
Profile selection depends on your specific situation:
– L-style (Type C) – Basic residential applications
– D-style (Type D) – Improved water separation, preferred by manufacturers
– F-style – Extended reach for retrofit applications
– Hemmed edge – Safer installation with rolled edges
Matching Profile & Finish to Roof Type
Standing seam roofs work best with profiles that accommodate thermal movement. The drip edge must allow panels to expand and contract without creating stress points.
Corrugated metal roofing needs drip edges that follow the panel profile. Special closure strips may be required to seal the gaps between corrugations and the drip edge.
Color matching isn’t just aesthetic – it’s about thermal performance. Light colors reflect heat, while dark colors absorb it. Mismatched colors can create differential expansion that stresses connections.
Ordering & Cutting Lengths
Standard drip edge comes in 10.5-foot lengths, though some manufacturers offer 8-foot sections. Always order 10% extra to account for waste, corner cuts, and potential mistakes.
Overlap requirements are non-negotiable – adjacent pieces need at least 2 inches of overlap to prevent leaks. Some installers prefer 3-4 inches for extra security.
Step-by-Step Drip Edge Installation Metal Roof
Ready to tackle your drip edge installation metal roof project? Let’s walk through this step-by-step. While it’s definitely a job that requires attention to detail, many homeowners find it manageable with the right preparation.
Safety isn’t negotiable here. Metal roofing work means you’re dealing with sharp edges, potentially slippery surfaces, and height. Never attempt this during wet, windy, or icy conditions.
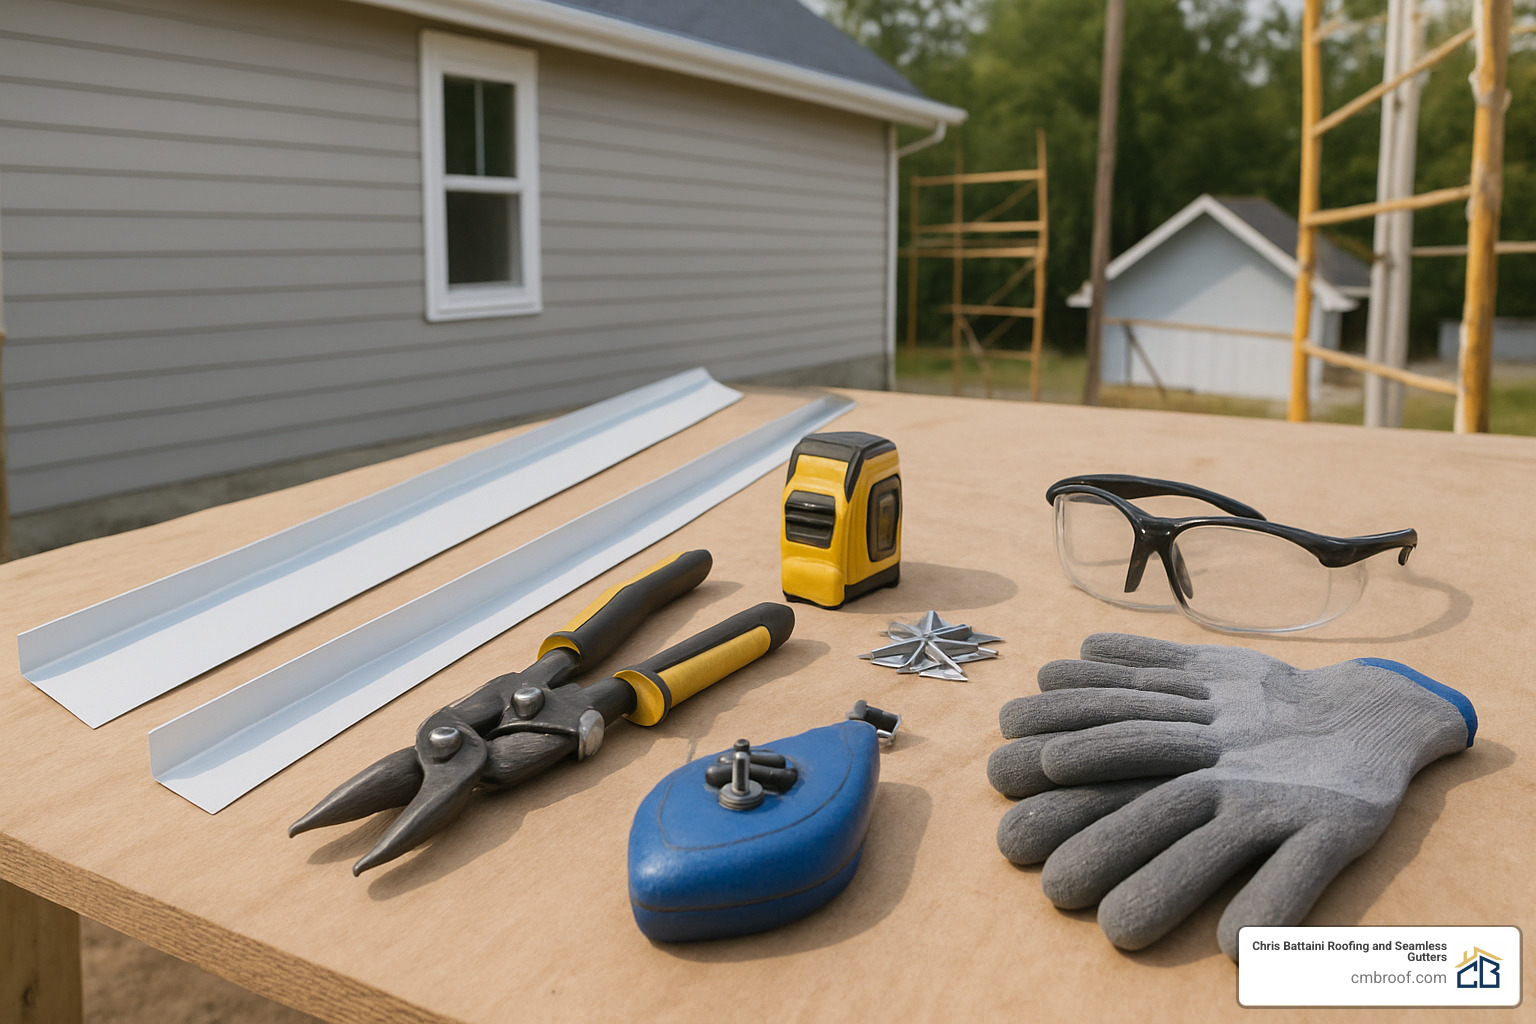
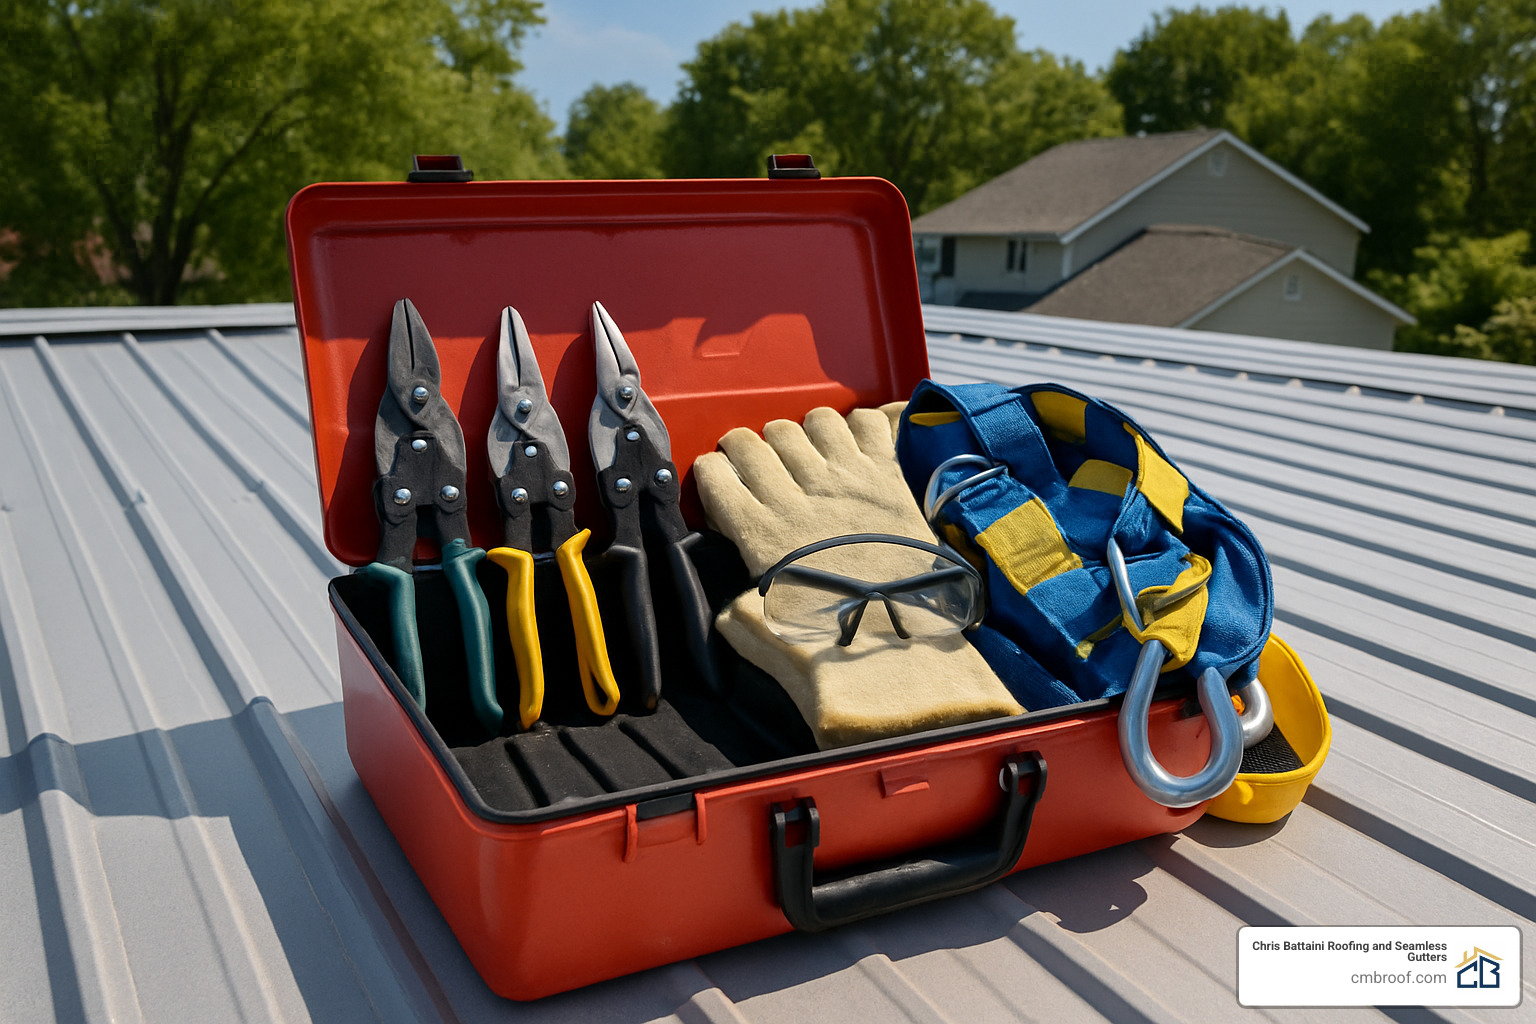
Your essential tools include a measuring tape, chalk line, aviation snips (you’ll want left, right, and straight-cutting versions), a drill with hex head bits, and appropriate fasteners. Don’t forget your safety gear – harness, non-slip shoes, and work gloves are must-haves.
Before you start cutting anything, take time for thorough preparation. Clean all debris from the roof edges and inspect for any structural damage. It’s much easier to fix problems now than after you’ve installed the drip edge.
Here’s something that trips up many DIYers: the underlayment sequence. At the eaves (the horizontal edges), your drip edge goes UNDER the underlayment. At the rakes (the sloped edges), it goes OVER the underlayment. This layering ensures water always flows over the component below it.
For more detailed guidance on the overall process, check out our guide on metal roofing installation.
Measuring & Cutting for Drip Edge Installation Metal Roof
Accurate measuring saves money and headaches. Start at one corner and work systematically around your entire roof perimeter. Mark your measurements clearly – you’ll thank yourself later when you’re balancing on a ladder with materials in hand.
When it comes to cutting techniques, sharp aviation snips are your best friend. Support the material properly to prevent unwanted bending, and always cut slightly long rather than short. You can always trim more, but you can’t add material back.
Corner cuts require special attention. Those 45-degree angles need to be precise for a professional-looking result. Here’s a pro tip: practice on scrap pieces first.
Installing at Eaves vs Rakes – Drip Edge Installation Metal Roof
Eave installation happens first, before your underlayment goes down. Position the drip edge so it extends about 1/4 to 1/2 inch beyond your fascia board. This overhang is crucial – it ensures water drops cleanly into your gutters instead of running down the fascia and potentially causing rot.
Fastener spacing follows building code requirements of every 12 inches. Never go beyond 16 inches between fasteners, and place them high enough that your roof panels will cover the fastener heads.
Rake installation is different – it happens after your underlayment is in place. The rake drip edge should overlap the eave drip edge at corners, with the rake piece sitting on top. This maintains proper water flow direction.
Pay close attention to gutter alignment. Your drip edge should direct water squarely into the gutter – not overshooting it, not falling short.
Handling Corners, Peaks & Overlaps
Corner details separate amateur work from professional results. Inside corners need careful cutting and folding to maintain your water barrier. Outside corners require overlapping pieces, with the upper piece always layered on top of the lower one.
The 2-inch overlap rule isn’t just a suggestion – it’s essential wherever pieces meet. This overlap must be sealed with roofing cement or high-quality sealant to prevent wind-driven rain from finding its way through.
Retrofitting Without Removing Panels
Sometimes you need to add drip edge to an existing roof without the expense and hassle of removing panels. It’s definitely possible, though it requires some creativity and extra attention to sealing.
F-style drip edge works particularly well for retrofits because it can slide under existing panels. Gently lift the panel edge with a pry bar, slide the drip edge into position, and secure it to the fascia.
Sealant application becomes even more critical in retrofit situations. Use a high-quality polyurethane or butyl-based sealant at all connections.
For more insights on proper fastening techniques, our guide on attaching metal roofing provides additional helpful details.
Codes, Costs & Common Mistakes to Avoid
Building codes aren’t just bureaucratic red tape – they’re your protection against water damage and structural problems. IRC Section R905.10 sets the baseline requirements that every drip edge installation metal roof project must meet.
The code is pretty specific: your drip edge needs to extend at least 1/4 inch below the roof sheathing and reach back 2 inches onto the roof deck. Mechanical fasteners can’t be spaced more than 12 inches apart – no exceptions.
ANSI/SPRI ES-1 standards kick in for commercial work and high-wind residential areas. These requirements are more demanding, with stricter testing and installation procedures.
Here’s where things get interesting – and expensive. Cost reality varies wildly depending on your location, roof complexity, and material choices.
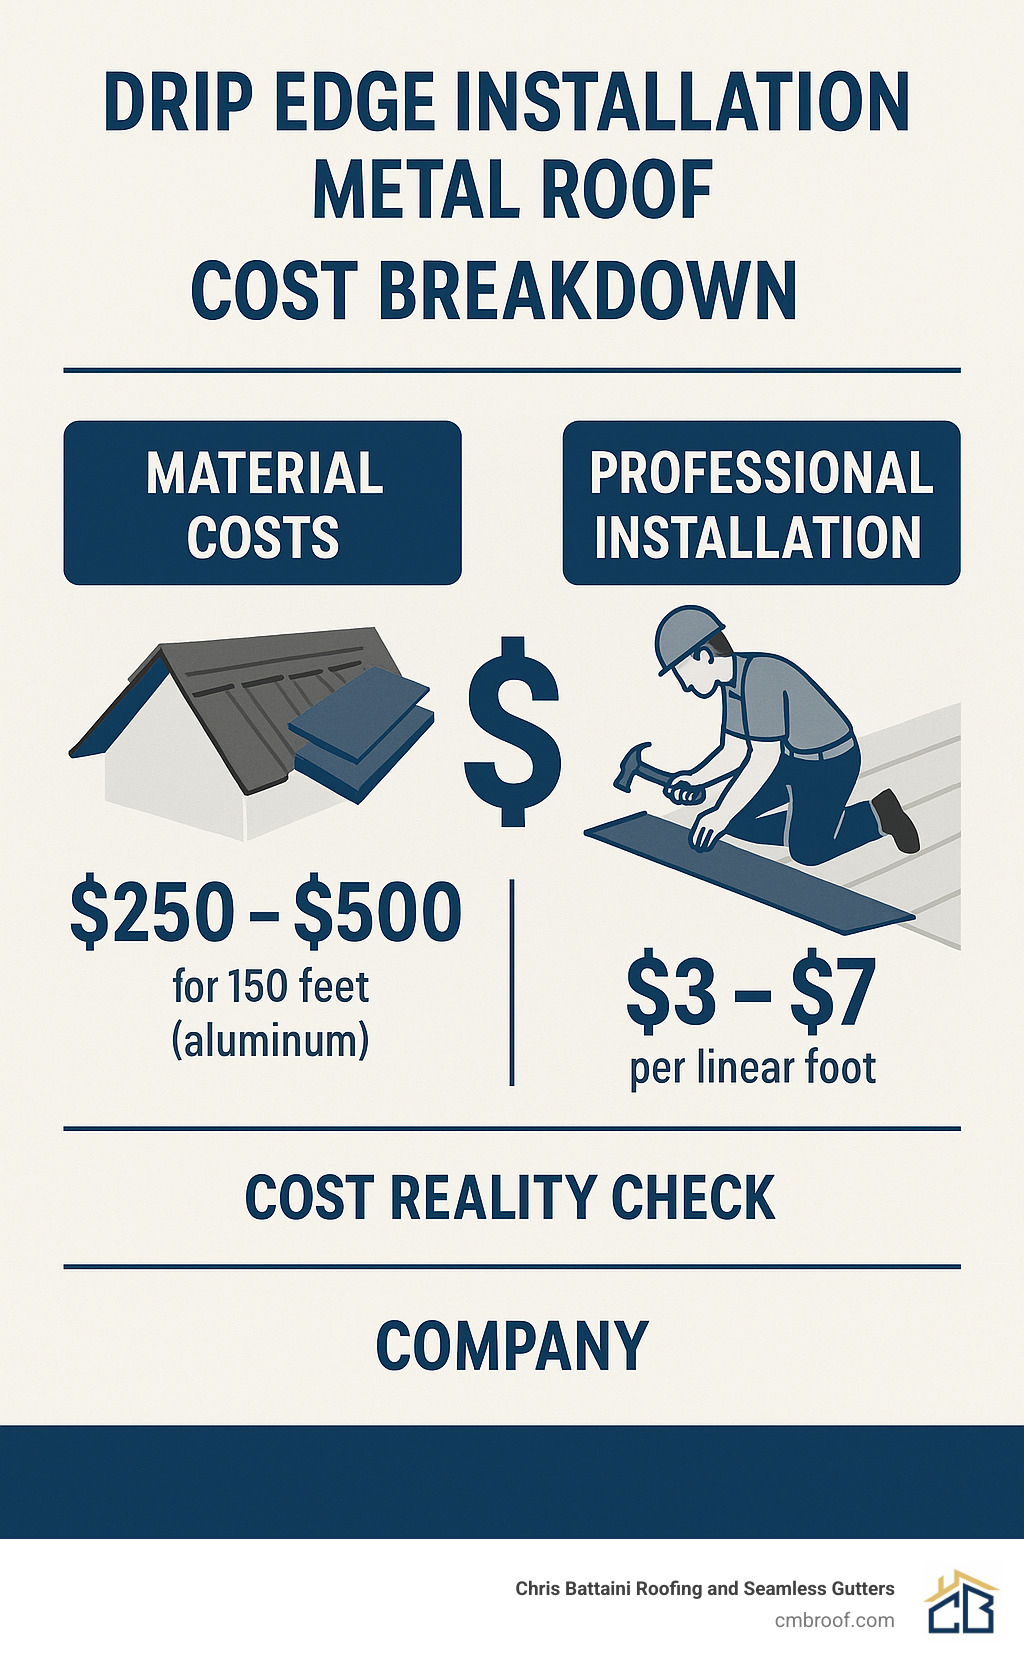
Based on internet data, DIY materials typically run $250-$500 for a standard 150-foot roofline using basic aluminum drip edge. Professional installation averages $3-$7 per linear foot, though high-end projects with copper materials or complex architectural details can reach $15+ per linear foot.
These are average internet costs, not actual pricing for Chris Battaini Roofing and Seamless Gutters.
Don’t forget the hidden expenses that catch homeowners off guard. Fascia board repairs, gutter realignment, permit fees, and disposal costs can add hundreds to your project budget.
Installation mistakes happen more often than you’d think, and they’re usually expensive to fix later. The most common error we see is drip edge installed too short – it doesn’t reach the gutters, so water still runs down the fascia.
Reverse lapping creates another headache. When the upper piece sits under the lower piece, water gets trapped instead of flowing away.
Inadequate fastener spacing might save a few minutes during installation, but it leads to loose, flapping drip edge during the first windstorm.
Budgeting & Material Take-Off
Linear footage calculation sounds straightforward until you start measuring a real roof. Those dormers, bay windows, and architectural details add up quickly. Measure each roof edge separately and total them – don’t try to estimate.
Smart homeowners order 10% extra material minimum. Complex rooflines with lots of corners and angles might need 15-20% waste allowance.
Avoiding Installation Pitfalls
Gutter misalignment creates problems that aren’t obvious until the first heavy rain. Your drip edge might be perfectly installed, but if gutters are positioned wrong, water still misses them.
Unsealed corners look minor but cause major problems. Every joint where drip edge pieces meet needs proper sealing, even the ones that seem protected.
Code non-compliance isn’t just about passing inspection – it affects insurance coverage and resale value. Some insurance companies void claims for water damage when building code violations contributed to the problem.
For more guidance on proper fastening techniques, check out our detailed information about attaching metal roofing.
Maintenance, Inspection & Gutters Integration
Your drip edge installation metal roof investment deserves ongoing attention to perform at its best. Think of maintenance as an insurance policy – a little effort twice a year prevents expensive surprises down the road.
Spring and fall inspections work perfectly with your seasonal routines. While you’re cleaning gutters or checking for winter damage, spend a few extra minutes examining your drip edge system.
Start by looking for loose fasteners – they’re often the first sign of trouble. Thermal cycling from our New England weather can gradually work screws loose, especially after harsh winters.
Corrosion spots appear as small rust stains or white powdery deposits on aluminum. Catch them early with touch-up paint, and they’ll never become a problem.
Sealant condition tells you a lot about overall system health. Cracked or missing sealant at joints allows wind-driven rain to penetrate, defeating your drip edge’s protective purpose.
The gutter integration aspect often gets overlooked, but it’s crucial for the entire water management system. Your drip edge should deliver water cleanly into gutters – not overshooting, undershooting, or creating splash-back onto fascia boards.
Debris accumulation in gutters affects drip edge performance more than most homeowners realize. When gutters overflow, water backs up against the drip edge and can find its way into places it shouldn’t go.

For comprehensive roofing and guttering services, professional installation ensures all components work together effectively.
When to Repair or Replace
Water stains on fascia boards serve as your early warning system. If you see dark streaks or peeling paint below your roof edges, your drip edge isn’t doing its job.
Ice buildup at eaves during winter indicates poor water flow management. While some ice formation is normal in our climate, excessive buildup suggests your drip edge system needs attention.
Bent flanges happen more often than you’d think. Ladder placement, falling branches, or maintenance work can damage the critical water-directing edge.
Pest activity near roof edges often indicates gaps in your drip edge system. Carpenter bees, wasps, and even small rodents can exploit these openings.
Simple Upkeep Tips
Hose testing provides the most reliable way to verify your system works properly. Run water along different sections of your roof edge and watch how it flows.
Touch-up paint prevents small scratches from becoming major headaches. Keep a small container of matching paint handy.
Annual fastener checks take just a few minutes but prevent major problems. Walk your roofline each fall and tighten any loose screws.
The key to successful drip edge installation metal roof maintenance is consistency. Small problems caught early stay small and inexpensive.
Frequently Asked Questions about Drip Edge Installation Metal Roof
Do I need a drip edge on low-slope and steep-slope metal roofs?
Yes, both roof slopes benefit from drip edge installation. Here’s why the pitch doesn’t matter as much as you might think.
Low-slope roofs (under 4:12 pitch) actually face greater risks because water moves more slowly across the surface. This gives it more time to find gaps and seep under panels. Drip edge installation metal roof projects on low-slope applications often prevent the most expensive water damage repairs.
Steep-slope roofs shed water faster, but that creates a different challenge – controlling where all that water goes. Without proper edge protection, fast-moving water can overshoot gutters entirely or create erosion problems around your foundation.
Building codes don’t discriminate by slope either. Most jurisdictions require drip edges regardless of pitch, and metal roof warranties often make them mandatory for coverage validity.
Can I add drip edge to an older roof without full tear-off?
Absolutely, and it’s often one of the smartest upgrades you can make. Retrofit installations require more finesse, but they deliver significant protection benefits without the expense of a complete roof replacement.
F-style drip edges work particularly well for retrofit applications because they’re designed to slide under existing panels. The extended vertical leg gives you more room to work with, and you can often install them without disturbing the main roof surface.
The key is working methodically. Choose calm, dry weather and tackle the project in small sections to minimize exposure time. You’ll need a pry bar to gently lift panel edges, but don’t force anything – metal roofing can crease if handled roughly.
How far should the drip edge overhang into gutters?
The drip edge should extend about 1/2 to 3/4 inch beyond the fascia, directing water into the gutter’s outer third. Getting this measurement right makes the difference between a system that works perfectly and one that creates new problems.
Too little overhang allows water to run down the fascia – you’re basically back where you started. Too much overhang can cause water to overshoot the gutter entirely, especially during heavy rainfall when water velocity is high.
Gutter positioning matters just as much as drip edge overhang. The gutter’s back edge should sit about 1/4 inch below the drip edge to catch water effectively without creating a backup situation.
Conclusion & Next Steps
Your drip edge installation metal roof journey doesn’t end when the last fastener goes in. You’ve just added a crucial layer of protection that will guard your investment for decades to come.
Think of drip edge as your roof’s unsung hero. It quietly directs thousands of gallons of water away from vulnerable areas every year, prevents pest invasions, and keeps your fascia boards from rotting. The peace of mind alone makes it worthwhile.
The fundamentals never change – choose materials that’ll outlast your roof, follow that critical eave-under, rake-over sequence, and never skimp on those 2-inch overlaps. Your gutters will thank you, your fascia will stay healthy, and your insurance company will smile at your proactive approach.
Local codes matter more than you might think. What works perfectly in one town might not fly in the next county over. Building officials aren’t trying to make your life difficult – they’re protecting your investment and your family’s safety.
Here’s what we’ve learned after years of New England weather: owner-led, on-site service makes all the difference. When the owner shows up with tools in hand, you know the job gets done right. No shortcuts, no “good enough” attitudes, just solid workmanship that stands up to whatever Mother Nature throws at it.
Professional installation often surprises homeowners with its value. You could rent tools, buy materials, and spend your weekend on a ladder. But when you factor in safety equipment, waste allowance, and the learning curve, many folks find professional work surprisingly reasonable.
Your roof deserves the best. Whether you tackle this project yourself or bring in professionals, the important thing is getting it done right. Poor installation today means expensive repairs tomorrow.
For more information about professional roof installation, we’re here to help you steer the options and find the approach that works best for your situation and budget.
Ready to protect what matters most? Every day you wait is another day your roof edges remain vulnerable. Whether it’s a quick consultation or a complete installation, we’re here to help you make the right choice for your home.
Chris Battaini Roofing and Seamless Gutters serves Berkshire, Hampden, Hampshire, and Franklin Counties in Massachusetts, bringing decades of hands-on experience to every project we undertake.
